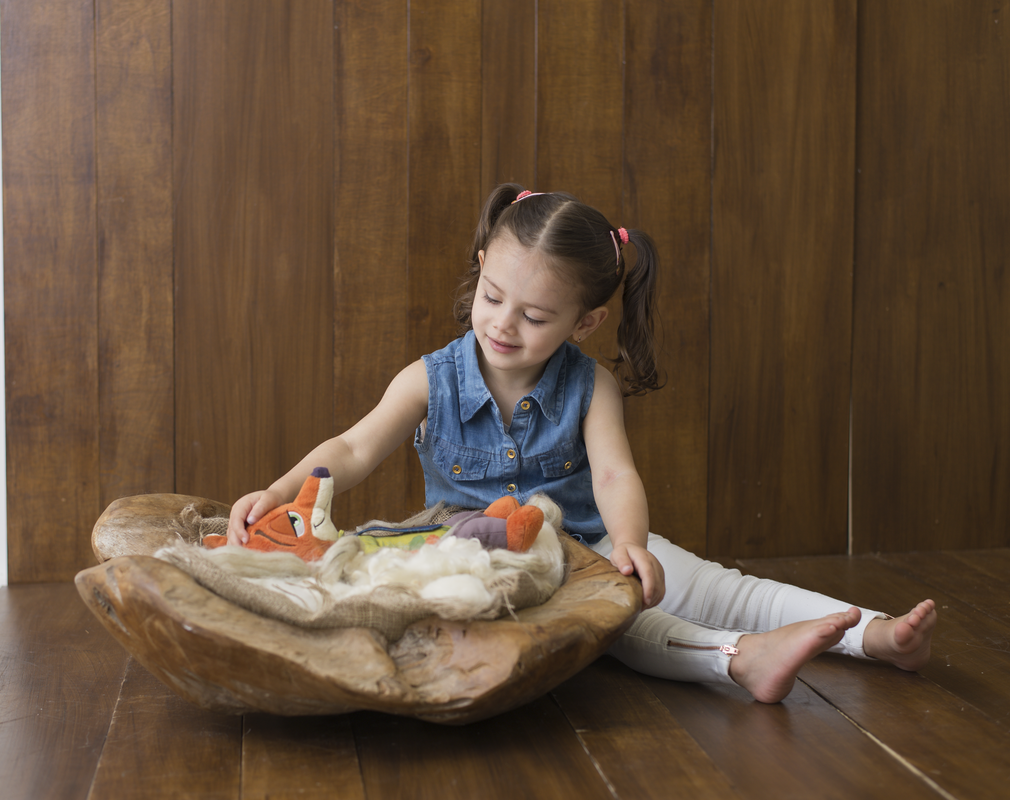
HOW TO COMPOSITE NEWBORN IMAGES AND KEEP BABIES SAFEAs a newborn photographer in Leicester, my number one priority in a session is safety! “Compositing” is a very popular technique used by responsible newborn photographers. A composite image involves taking two or more images, and using Photoshop to combine them into one. There are a number of reasons for me composting images and im going to list a few below: 1) Young Siblings We have a number of returning customers last year, bringing with them a toddler and newborn. With this brings a number of safety issues and ones we are very careful with, those beautiful images of toddler next to baby is actually two separate images. With Bumps Baby Beyond we capture your toddler happily gazing down at their teddy/toy in the basket next to them; once we have finished with sibling we capture your newborn safely snuggled in the prop and put the two images together. 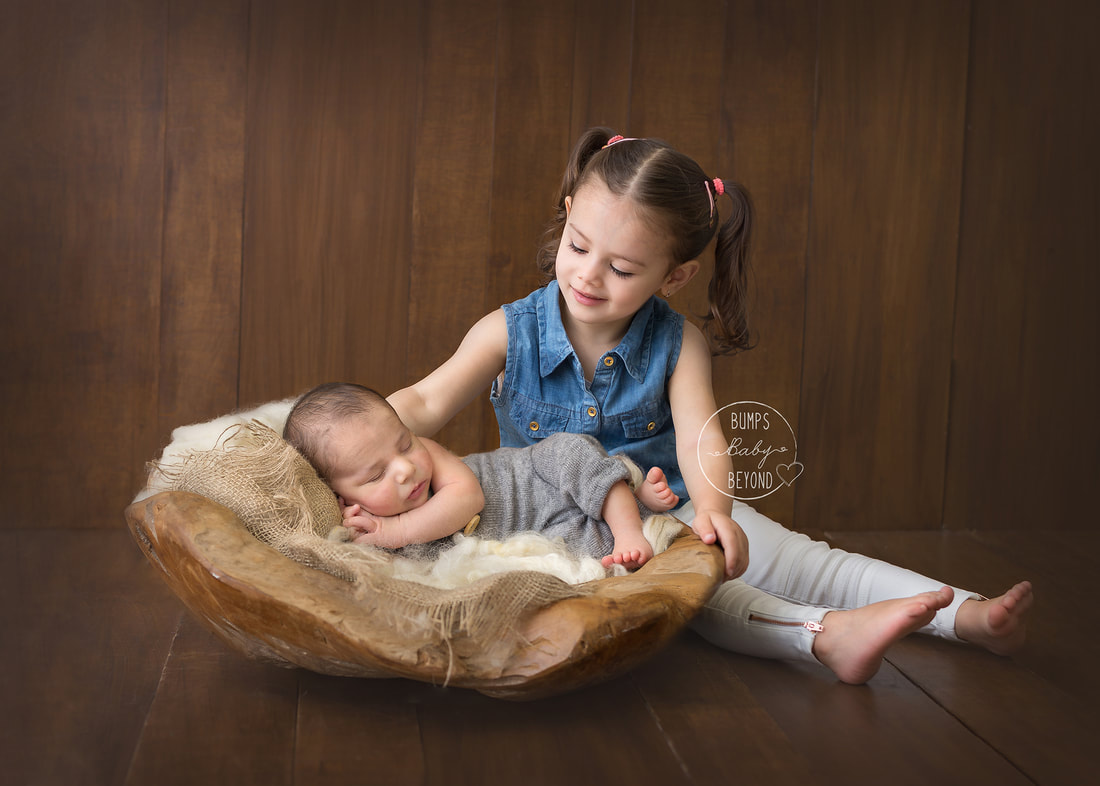
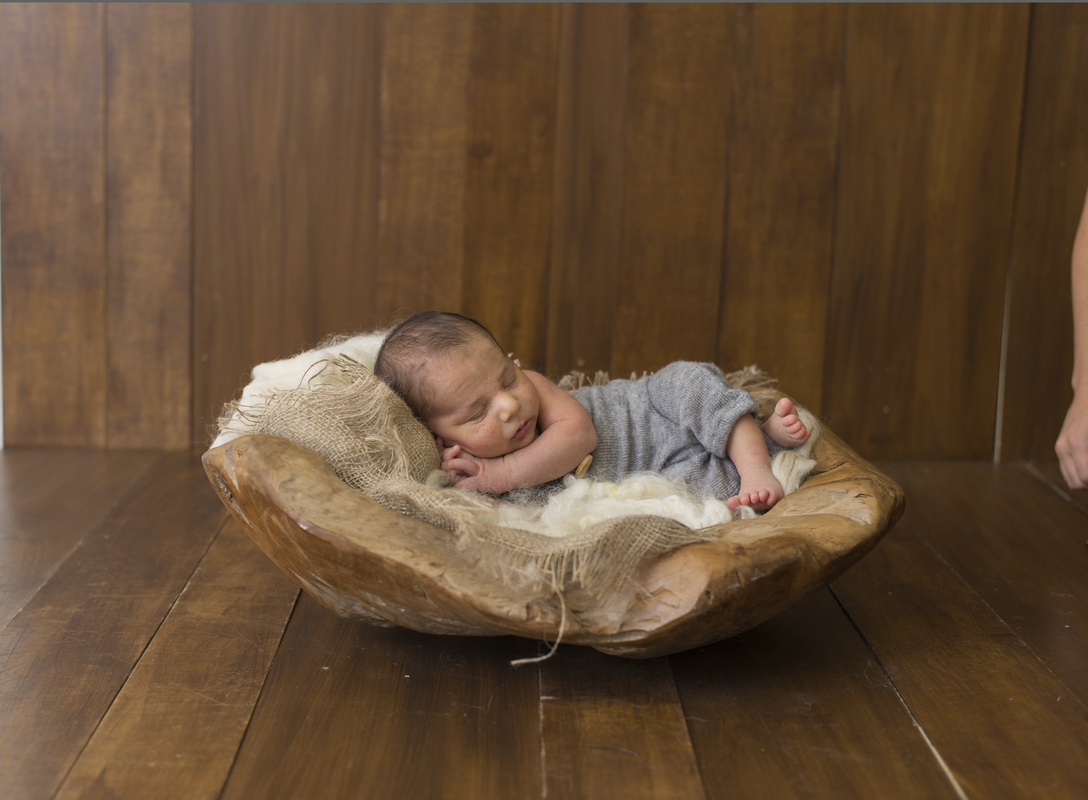
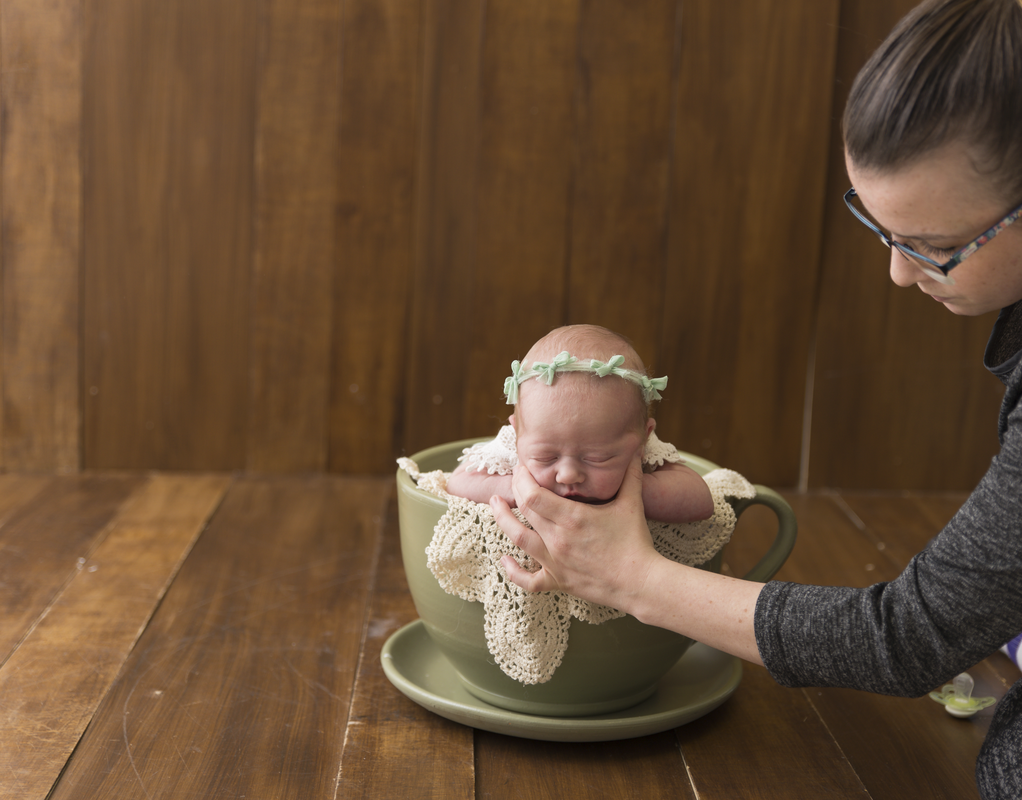
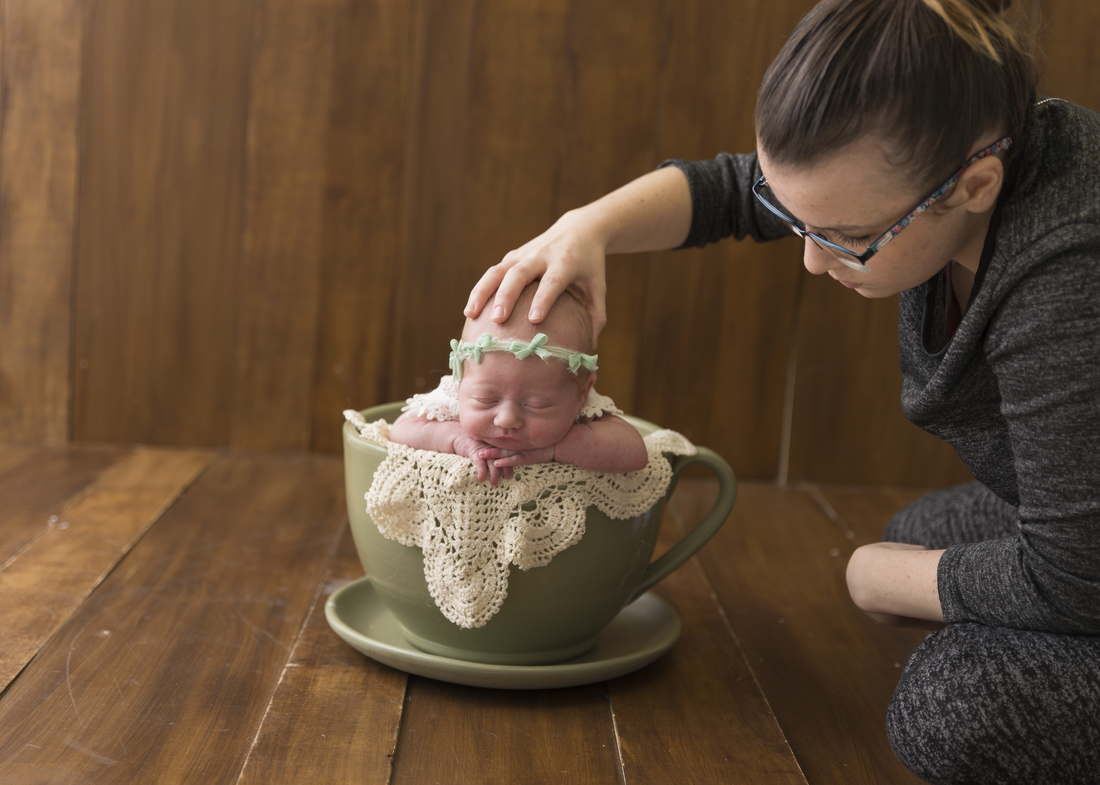
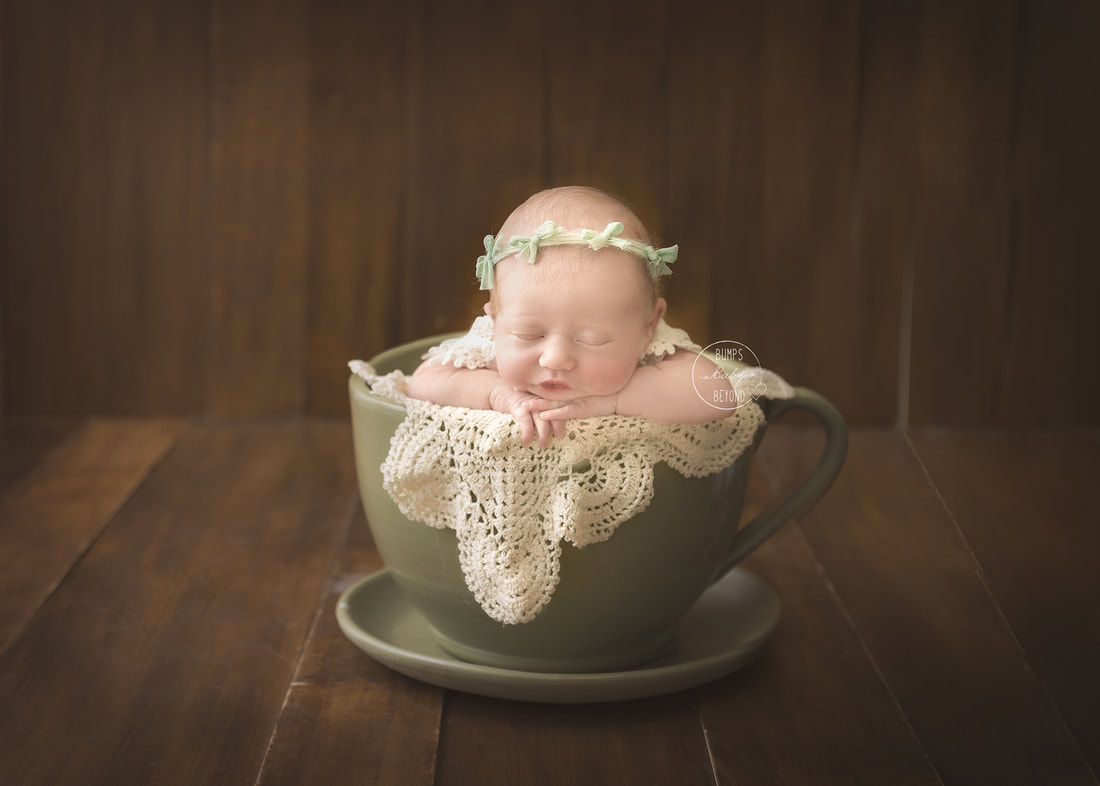
2) Certain Poses Sleeping newborns, with such precious little faces, make amazing photographs. Who doesn’t love a pair of chubby cheeks squished strategically between two tiny hands? All poses we carry out during your newborn session are 100% safe, your little one is so used to being curled up in your womb that they may have already been in these positions throughout your pregnancy. When re creating these images I want to insure no weight or pressure is put on your baby. This is why I have an assistant for EVERY session. She is fully trained in newborn safety and I believe this is crucial to running a safe session. The pose below is called the 'Froggy', when done correctly, it really is an adorable image. The entire face is visible, cute little feet are doing out, 10 little fingers and 10 tiny toes. 3) Digital Images Digital images are a brilliant way of adding variety into a gallery or creating stunning pieces of art without your studio bursting at the seems. With these images we capture your baby on a prop we have in the studio and then edit them into an image we already have. 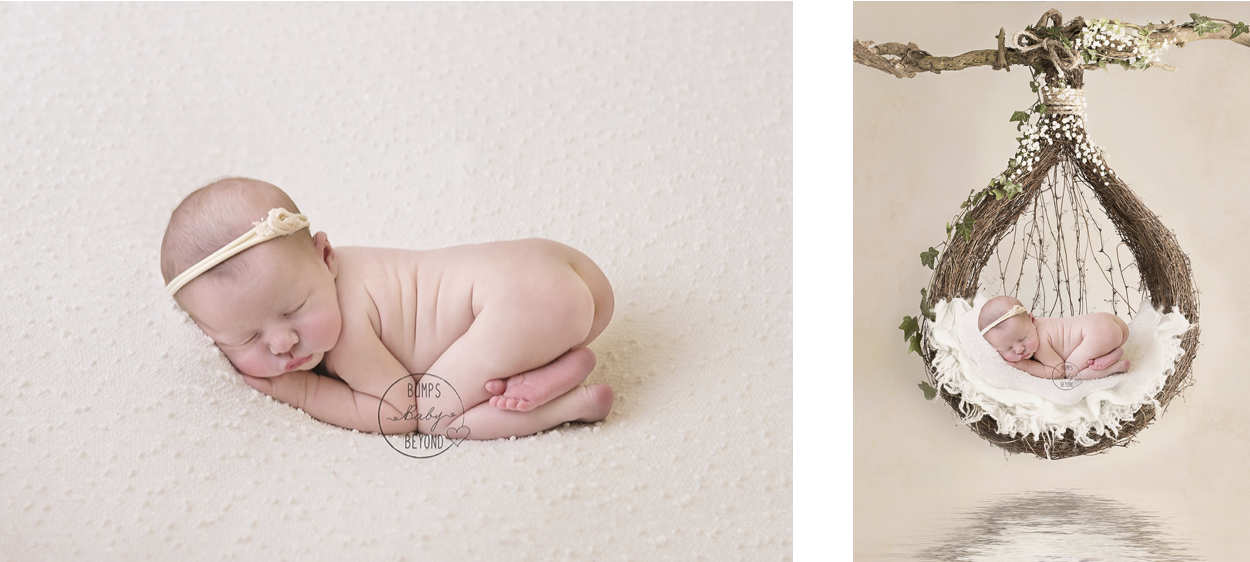 4) Props If a prop is not stable for baby to be left alone in my assistant will always be sat at the side with either her hand just above baby or holding onto baby, here is a full edit of the pose, putting the images together, and then editing the final image 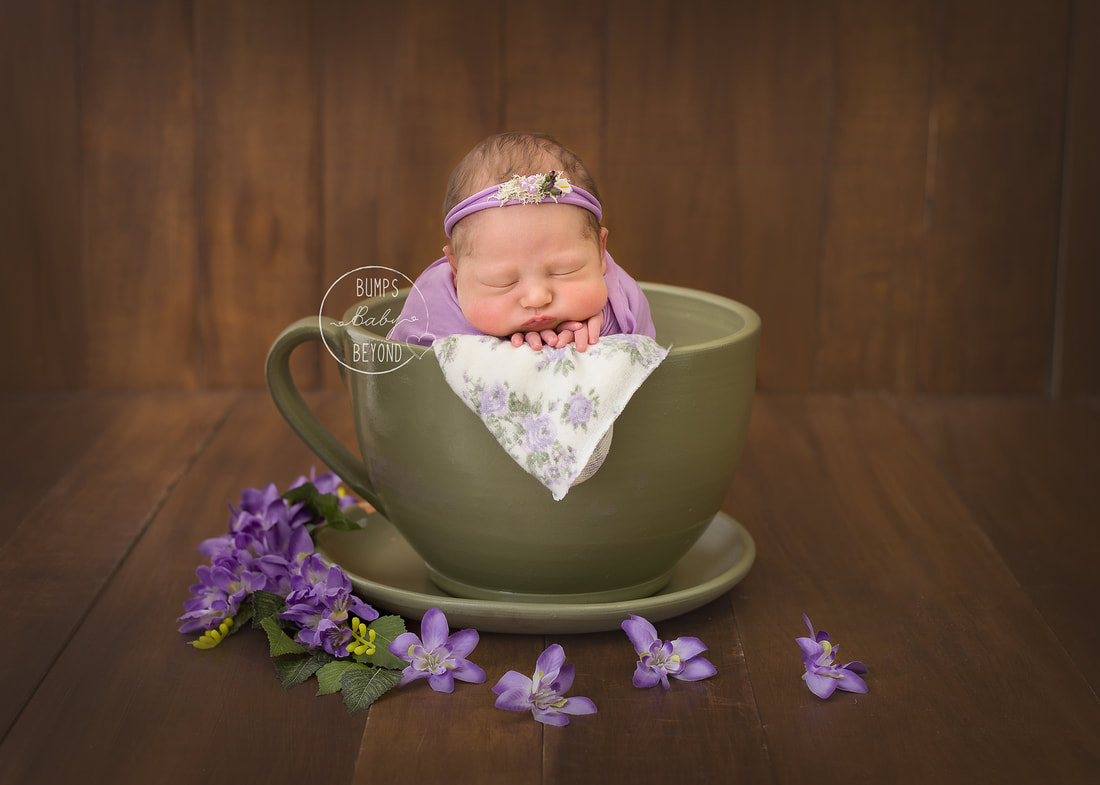
I love how each photographer has their own style of editing that makes us all so unique! Amanda Haddow Photography, Newborn Photographer in Victoria, BC. images are crisp and beautiful, and I love her use of colour!
8 Comments
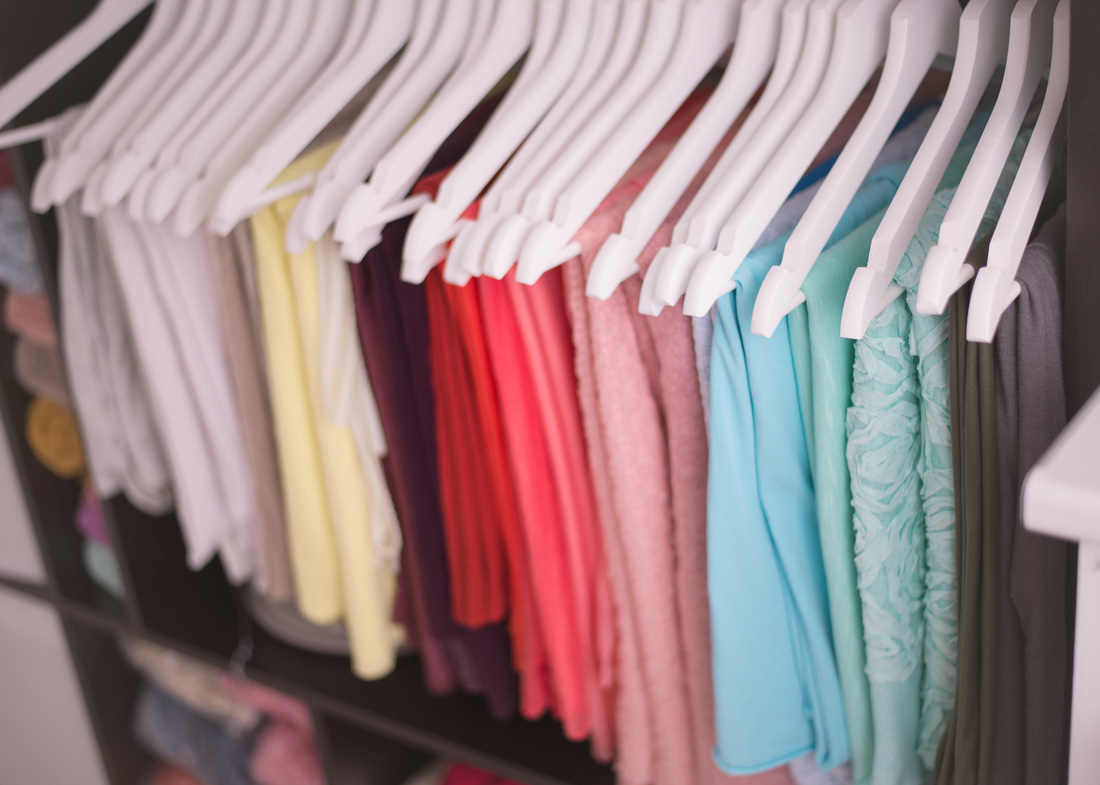
As a Child and Family photographer in Leicester I'm here to tell you now, gone are the days of everyone wearing matching outfits to their family portrait session... Thank goodness! There is nothing quite like a "photography trend" to date your photographs in years to come. But this does open up the question - what on earth do I wear? These photographs are going to hang on your walls for years to come, so you want them to last the test of time when it comes to your clothing choices. Here are our Top 5 tips to help you choose your outfits: TIP #1: CHOOSE 1-3 SOLID, CO-ORDINATING COLOURS Whether you prefer pastels, monochrome, bolds or neutrals - sticking to a small selection of colour will mean your photographs will look nicely coordinated and neat. TIP #2: THINK ABOUT YOUR HOME DECORATING Do you have bold colours on the walls? Creams? Busy wallpaper? Since you will be framing these photographs in your home, you'll want them to blend in and match your decor. 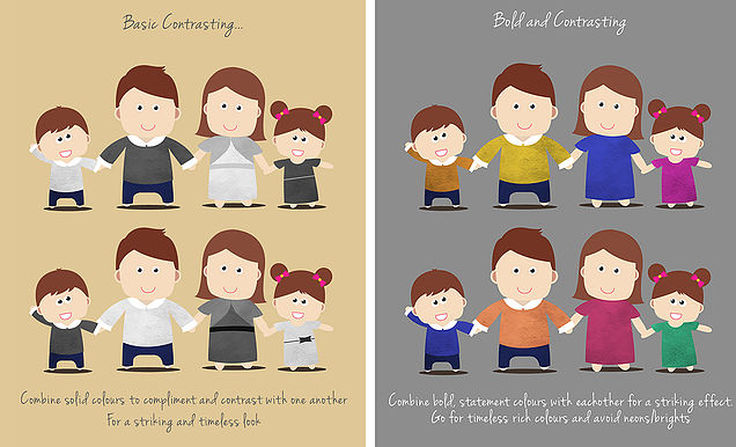 TIP #3: SMART, BUT NOT TOO SMART - KEEP IT COMFORTABLE Tuxedos and ballgowns have a place in photography, but perhaps not for your family portrait. You still want to look like "you". Rather, think what you would wear to a nice resturant in the evening. Make sure you're comfortable and feel like yourself in these clothes. 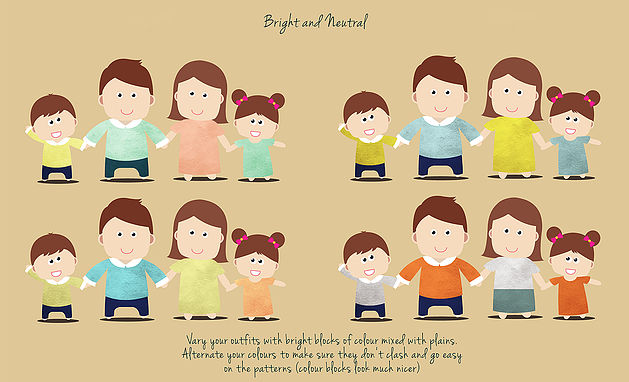 TIP #4: CHOOSE TOPS WITH SLEEVES AT LEAST TO THE ELBOW There are certain parts of your body you may like to play down in a photo shoot. You want your lovely family's faces to stand out the most, so choose darker bottoms, tops with sleeves that cover the elbow and black socks/shoes. This rule is more for the grown-ups than the kids ;-) TIP #5: AVOID LOGOS AND USE PATTERNS SPARINGLY Patterns look great every day out and about, but can add a lot of distraction to a still photograph. If you wish to use patterns, go easy and we recommend just one of you wear a pattern with the rest in co-ordinating block colours to compliment. A chequered shirt or floral dress can look lovely... in moderation! The same goes for the kid's tops: Yes, Frozen might be their favourite film but an Elsa top can be very distracting in your portrait. 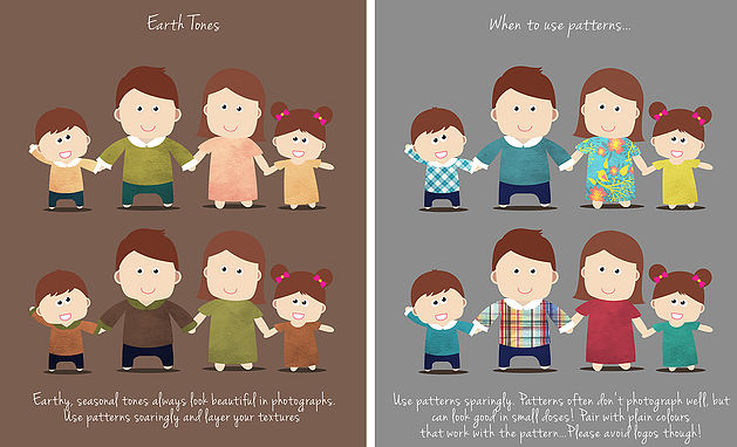 So in a nut shell, think "timeless and classic" when it comes to your precious photographs. Keep it simple and go with your heart! These are your special images and you'll want to look at them with pride for years to come.
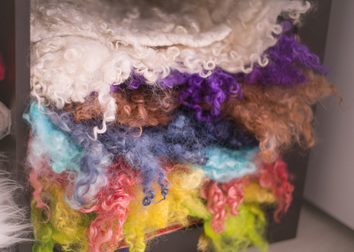
Leicestershire Newborn Photography StudioTo say I love my studio is an understatement! It is everything I have ever wanted and so much more! It is an overview of my style, an extension of my personality, the realisation of my vision, my happy place to create art, my little piece of heaven! The studio was designed by me and built by my incredibly handy partner Kevin; with the help of my step dad and Kev’s friends...and my kiddies (or at least they tried!) Please consider leaving a comment on my blog, it would be greatly appreciated. For questions about my studio, please post them on the blog and I will do my best to reply to your questions. 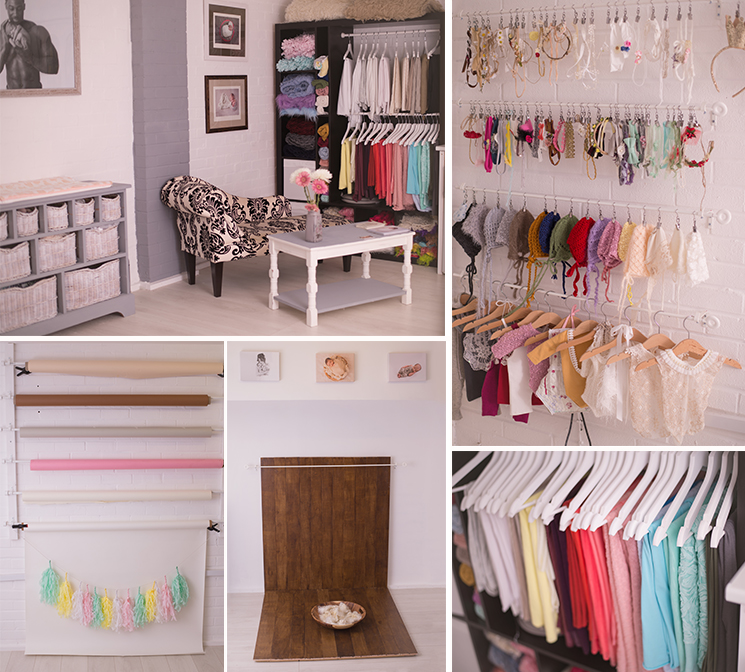 Where it all began... I love photography and came into it quite late, I’ve only actually been doing it since December 2014 but it soon cam apparent I would need my own space! After converting our front room to my workspace we soon decided this was not going to work in the long term. I looked into at commercial places to lease but the rent was just unjustifiable. Kev then mentioned moving house and we found the perfect one…1 minute from our old house! So in April 2016, we moved in and started to convert the garage into my dream studio. Kev works away Monday-Friday so did as much as possible at the weekends; he was determined to give me the studio of my dreams! we spent a lot of late nights, early mornings renovating this but it was so worth it <3 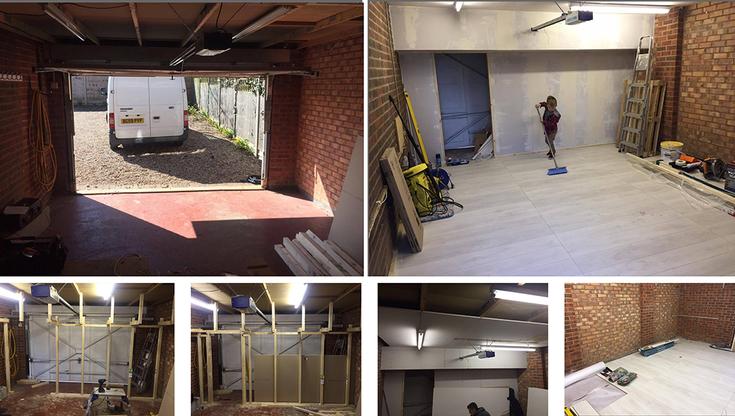 Kev managed to build the stud wall, ceiling and insulate it in one weekend – with the help of Riley of course (he comes in handy when sweeping is required hehe!). Once the shell was up he decided to lay the flooring which made the only job I had been given (painting) much much harder and I still say the floor should have been the last to go in but there’s no telling my other half! Even though we got a brick sealer I still had to do 2 sealer coats and a further 4 paint coats which without a radio can be very boring but it was all worthwhile! image below was after 2 coats applied... 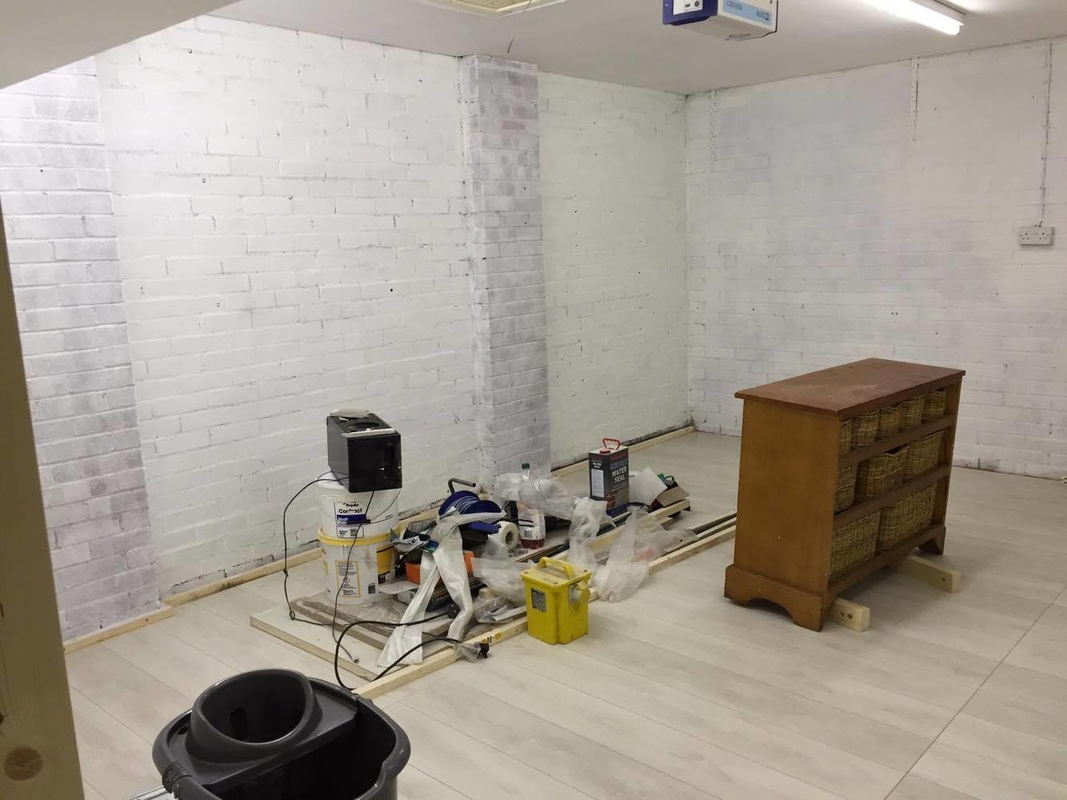 Ive always wanted a solid wood backdrop and decided this was the perfect opportunity to make one. Once I had the pieces of wood I needed I spent hours (and I mean hours) sanding it down to make sure it was 100% child safe and sealed it with both a wood stain and water protector for when the studio transforms for the 'Smash & Splash' sessions. 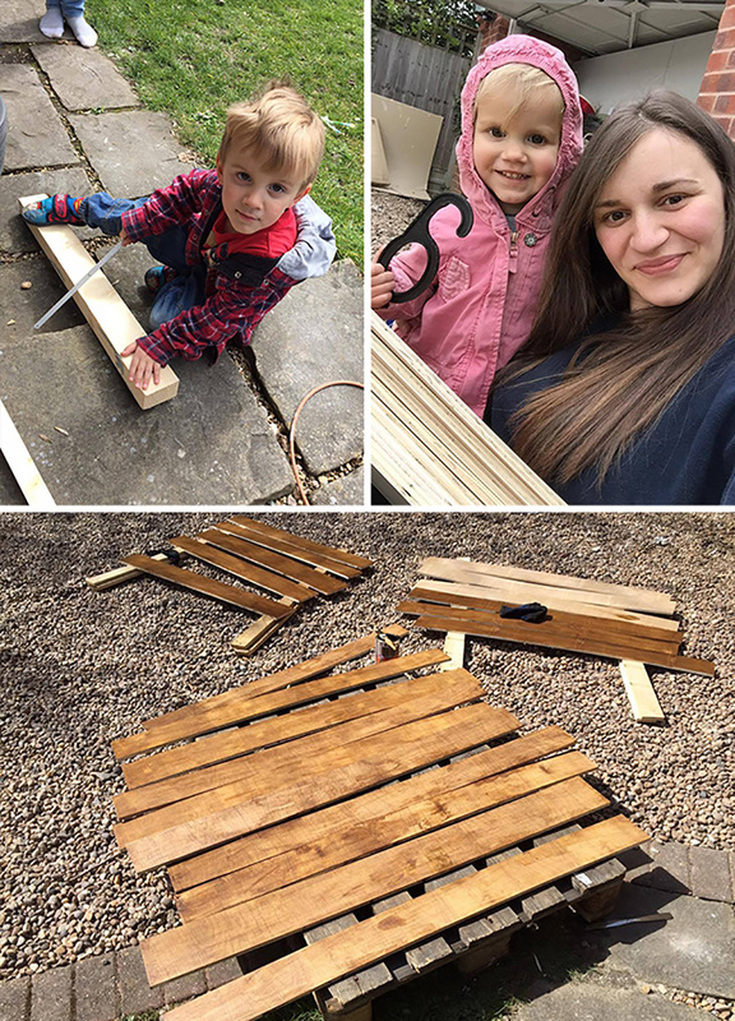 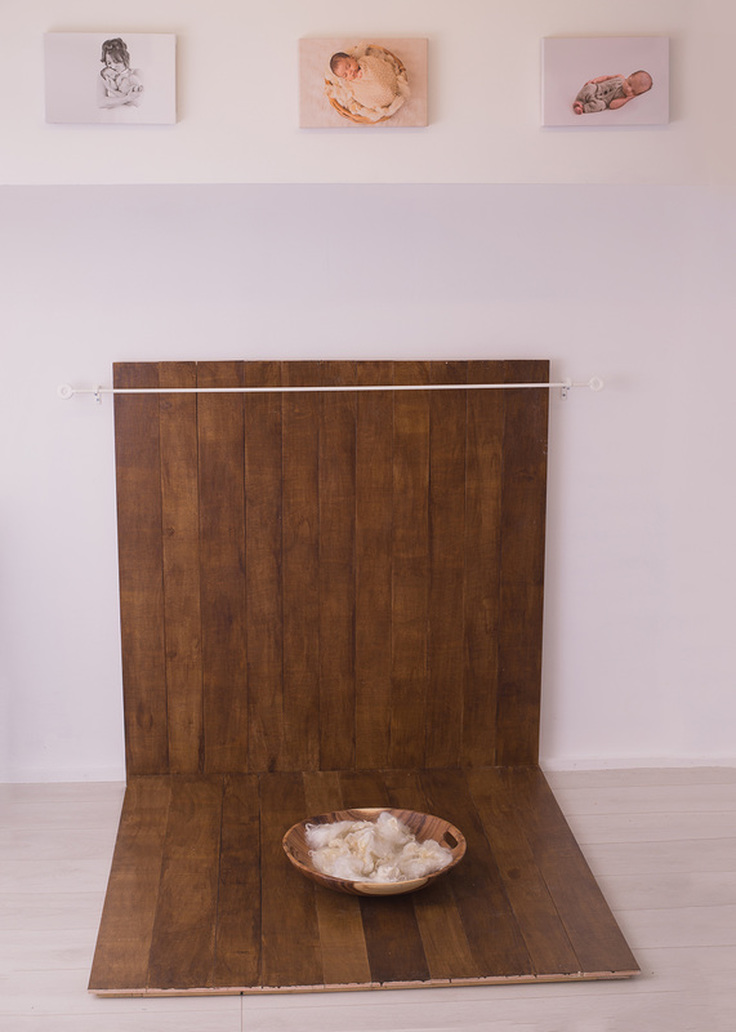 When designing my space, I knew I needed somewhere to store all my backdrops, fluff, and flokoti blankets. Ikea have brilliant storage solutions and I found a lovely TV unit. I turned this upside down and screwed curtain rails inside where the TV would stand to give me the space I required. My props are now stored neatly and easily accessible throughout my sessions which makes the word of difference when transitioning props!
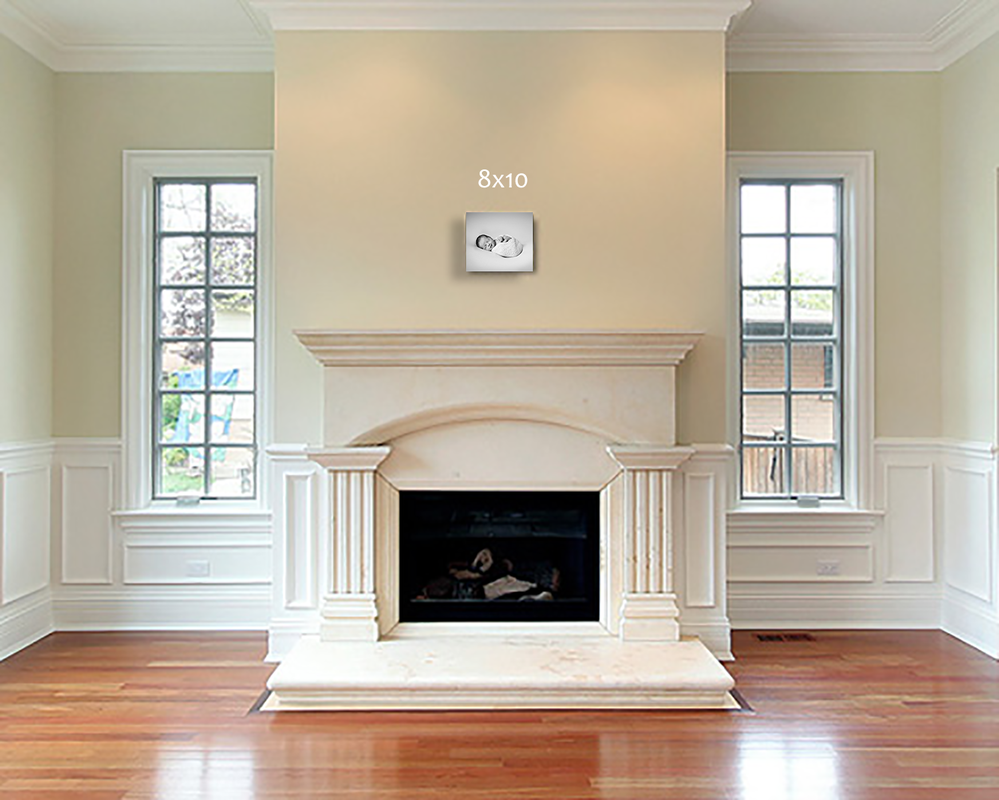
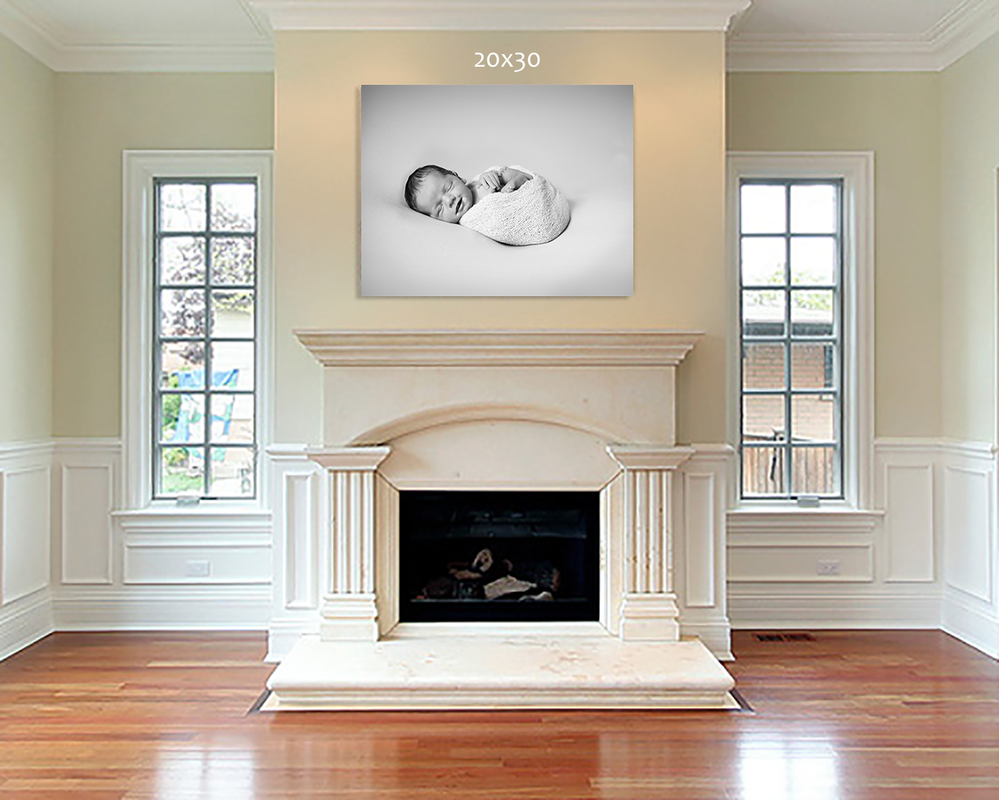
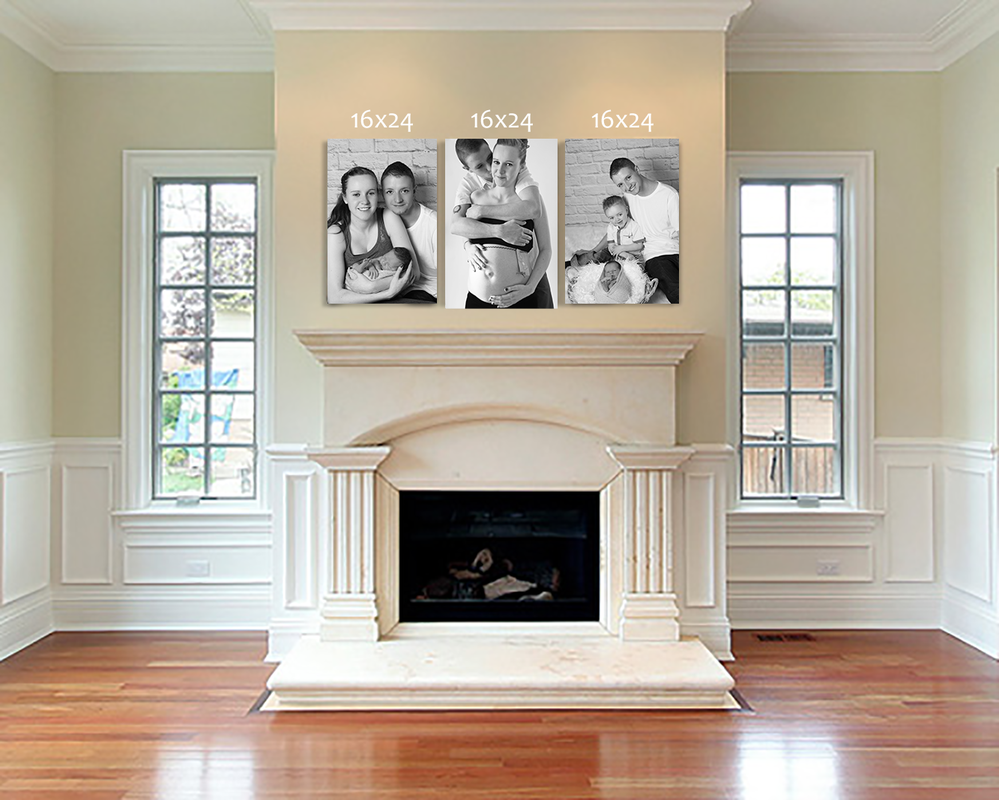
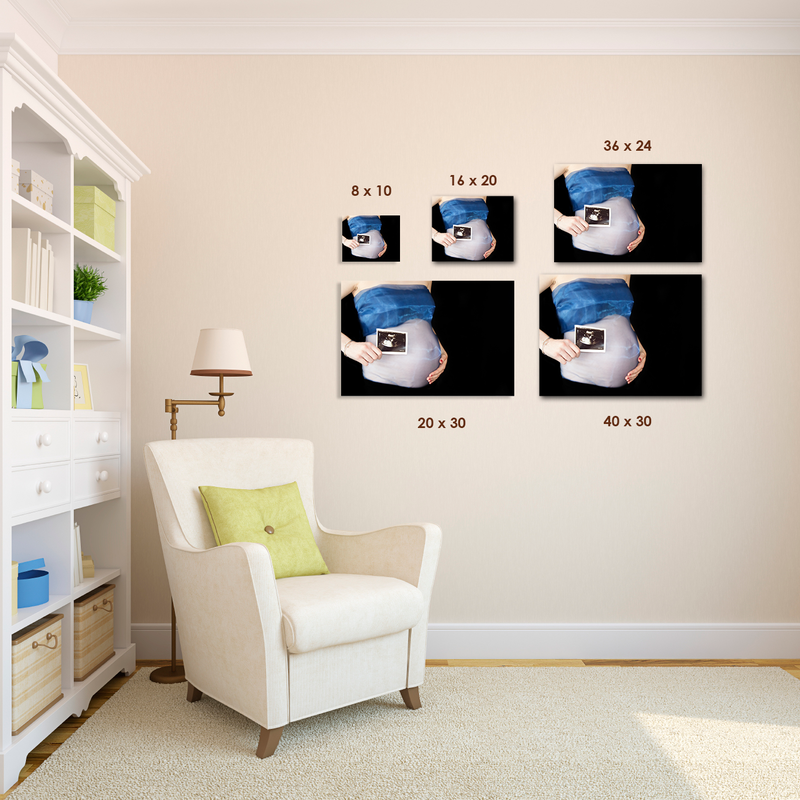
My stepdad made me a backdrop frame from left over wood and curtail rails, again these were from Ikea and are perfect for my Parent images or ‘Smash & Splash’ sessions. And my little rails for my hairbands, bonnets, and outfits are also from Ikea. I hope you enjoyed my blog on my new adventure and if you have any questions please do ask. Bea xx Size Does Matter…When it Comes to Wall PrintsWhat better way to treasure the first moments of your family than with personalised artwork for the walls of your home? As well as keeping your baby’s images close to your heart with albums and digital prints, you can include wall art in your collection to preserve these memories in a unique and custom display. To help you get started, here’s a brief guide to planning your wall art and prints:
Below are some example prints and sizes to give you an insight to what they look like 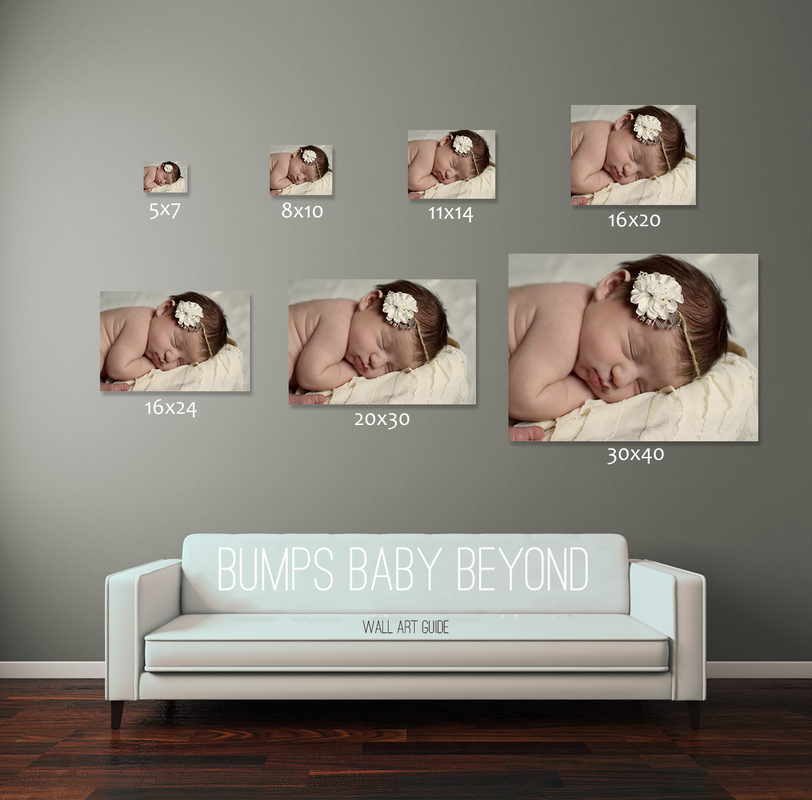
 We want you to cherish your choices forever, so please don’t hesitate to give us a call if you would like further guidance on choosing or using your wall prints and canvases.
|